Hello. Today I'll tell you about how HDPE pipes are welded when building domestic and industrial pipelines. The topic is of considerable interest, as low-density polyethylene pipes are becoming more and more in demand due to affordable cost, high strength and long service life.
Welding methods
Is it possible to do high-quality welding of HDPE pipes with your own hands? It is possible, but under one condition: special equipment must be used during installation.
Welding works are carried out in two ways:
- Butt-joint - the elements to be joined are heated to the melting temperature at the ends and joined under pressure;
- An electrowelded coupling is used, which is put on the combined ends and melted.
In relation to regions with seismic activity, it is advisable to use electrofusion couplings, which provide high strength connections. Butt welding is less durable, but in this case the price of the finished result is significantly lower.
Let's consider each of these methods in more detail.
Method one: butt welding polyethylene pipes
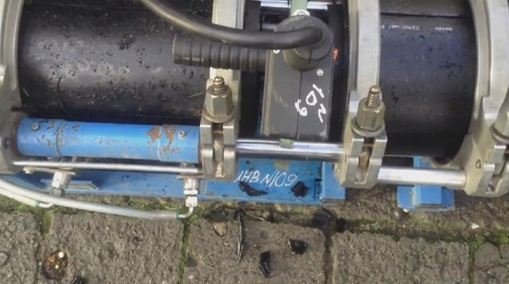
Modern equipment for butt-welding HDPE pipes consists of the following elements:
- the frame (centrator) is used to fix the joined pipes in the required position;
- trimmer (trim) is necessary for machining the joined ends;
- the heating element is used to heat the ends to the melting point;
- the hydraulic unit drives the pipes to be matched and ensures optimum joint tightness.
![]()
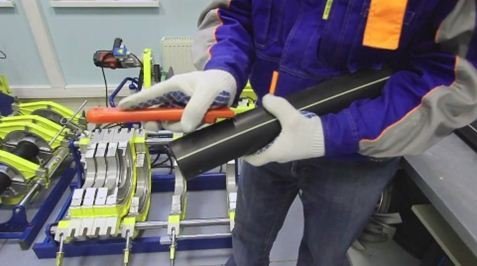
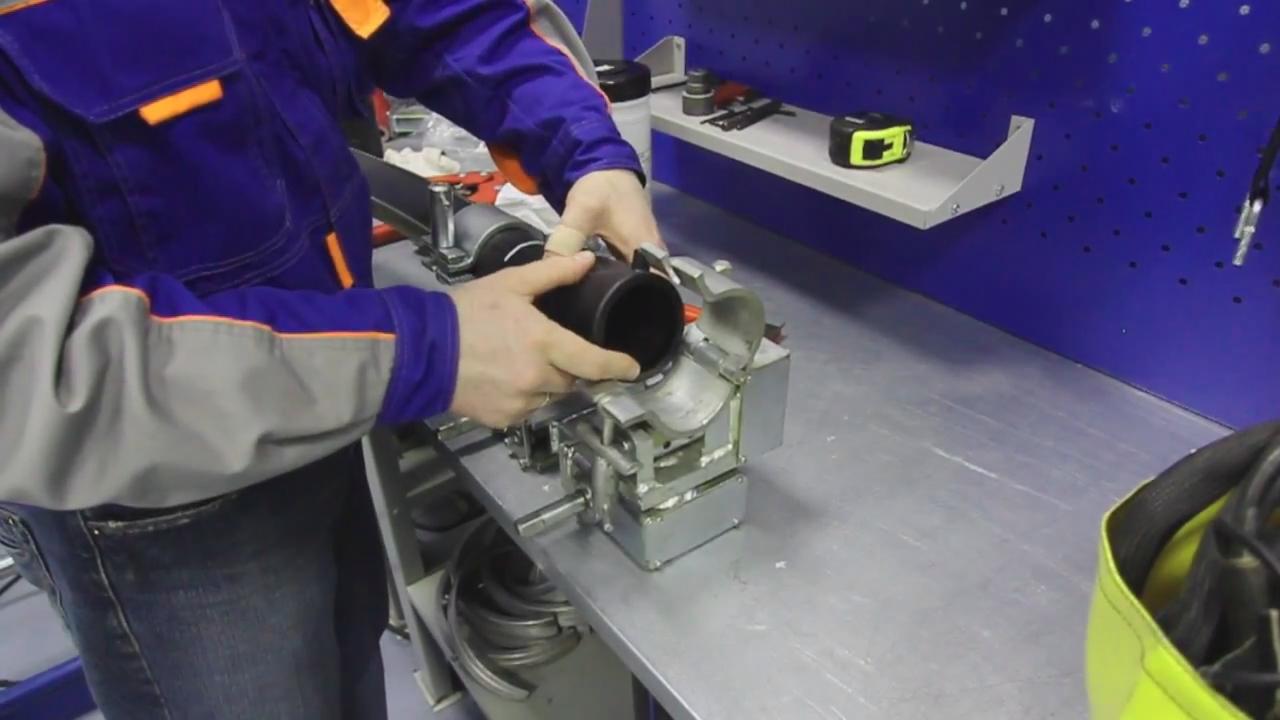
- We disassemble the centralizer, freeing up space for pipes (joining parts), for this we remove the fixing clips;

- We install the joined parts in the centralizer and fix them in the upper part with clamps;
We tighten the clamp screws equally on both the left and right sides. On the second clamp from the end we give more force, while on the first clamp from the end we give less force so as not to deform the pipe.
- By means of the control valve, we set the required pressure of the moving part of the centralizer;
Welding pressure is determined in accordance with the table provided with the equipment. Also, the following formula can be used to determine the welding pressure.

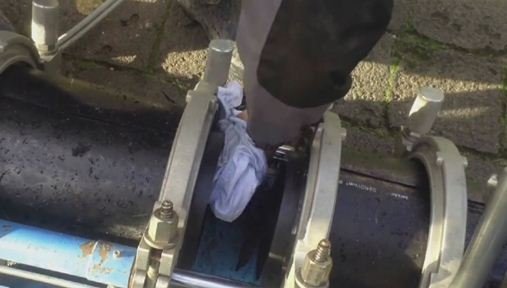
- We clean the surface of the ends from dirt and dust using special wipes or lint-free rags and alcohol as a solvent;

- We install the trimmer between the joined parts on the frame;
- We turn on the hydraulics and shift the joined elements, and then turn on the trimmer;
- We dismantle the centralizer and remove the remnants of plastic chips from the pipes;

- We check the joined parts for alignment;
- We clean the ends of fat;
- We install a heating element on the bed;
- We set on the timer the time and temperature necessary for melting the polyethylene walls;
For low pressure polyethylene, the melting point is at least +220°C.

- We turn on the hydraulics and bring the joined elements to the heater under pressure;

- We start heating, which will stop after the timer runs out;
- After the timer has beeped, turn off the pressure and remove the heating element;
- Again we bring the joined ends under pressure to obtain a strong and neat seam;

- We start the timer to cool the polyethylene;
The cooling of polyethylene for the quality of the seam is no less important than the welding itself. Therefore, we stand for cooling for at least 7 minutes and at this time we do not disturb either the connection or the centralizer.
- After the sound signal, turn off the pressure, disassemble the equipment and release the welded structure.
Method two: butt welding of curved sections of the pipeline with an extruder
Now we know how to weld polyethylene pipes end-to-end on straight routes. But what to do if you need to weld not a straight section of the route, but, for example, make a bend at an angle of 45 degrees? In this case, special equipment is used for welding HDPE pipes - an extruder.
Welding instructions are as follows.

Let's take a closer look at the steps listed in the diagram.
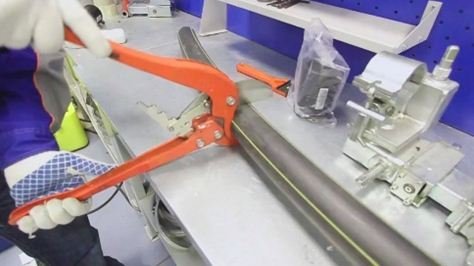
- Using a miter saw, we cut the ends of the pipes at the required angle;

- We remove the chips and cut off the burrs, after which we wipe the surfaces to be joined with a rag soaked in alcohol.

- The parts to be joined are laid on a flat surface, joined to each other at the right angle and held manually;

- On the extruder, we set the melting temperature of the granules (+220 ° C);

- Next, with an extruder, we make tacks at the junction of pipes;

- After the potholders are made, we wait 5-7 minutes for the plastic to cool;

- We apply plastic around the entire circumference of the parts to be welded;

- After the plastic is applied, we leave the structure to cool for 7 minutes, after which the welding is considered completed.
If, when applying plastic from an extruder, the seam is not very neat, it can be trimmed with a knife at the end of welding.
Now a few words about the strength of the weld. In terms of the experiment, after the plastic cooled down, the deformation of the assembled branch was performed.

The installer pressed on the seam area with his weight until the cross section of the round pipes became oval. Of course, similar experiments with butt-welded pipes by heating the ends will demonstrate a lower strength of the seam.
Method three: electrofusion welding
A review of methods for connecting polyethylene pipes would be incomplete without the use of electrofusion couplings. Today, this method is becoming more widespread due to the high strength and durability of the finished result.
The method is applicable both in the construction of pipelines in enclosed spaces, and when working in the field. A significant disadvantage of this method is the high price of couplings. On the other hand, such a cost is justified by the high performance of the connection.
Instructions for making connections using an electric coupling are in the following table.

Let's consider the above points in more detail.
- The butted ends are cut with a special pipe cutter in order to obtain optimal alignment during docking;
- Using a manual scraper, remove the oxide layer from the surface adjacent to the docking area (about 20 cm from the end);

- We remove the formed chips using the same scraper;

- We degrease the outer surface of the pipes and the inner surface of the coupling with special napkins or lint-free rags soaked in alcohol;

- We mark the pipes according to the size of the coupling for easier positioning in the centralizer;
- According to the marks made, we fasten the pipes and the coupling in the centralizer;
The prefabricated structure must be fixed, but not deformed. So that the round section of the pipes does not become oval, do not overtighten the clamps.
Barcode reading
- We turn on the device and read the barcode printed on the clutch body;
Most modern welding machines operate in semi-automatic mode. The heating and cooling time of the coupling is set in the process of reading the data encrypted in the barcode. Without reading the code, the machine will not start welding.
- After the code is read, we start the welding process, after which the device notifies with a sound signal;
- At the end of the welding process, we detect 7 minutes, after which the cooling of the polyethylene can be considered completed;
- We disassemble the clamps on the centralizer and release the equipment from under the soldering point.
This manual can be used as a guide for a superficial acquaintance with HDPE pipe welding processors. For best results, follow the manufacturer's instructions that come with both the machine and the coupler.
Output
So, now you know how to combine polyethylene pipes into a single whole. Any questions left? Ask them in the comments to the text. In addition, I recommend watching the video in this article.
July 31, 2016If you want to express gratitude, add a clarification or objection, ask the author something - add a comment or say thanks!